Monday, November 16, 2009

What to do With Retro Bathroom Fixtures

Do you have retro (read: outdated and ugly) fixtures in your bathroom but no money in your budget to replace them? With a little paint and a modern style you can make those fixtures look cohesive and current.
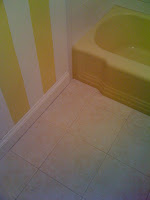
Here's a bathroom I recently did for a client who has a yellow bathtub, toilet and sink.
The stripes incorporate the fixtures and give the room a modern look. Add some beautiful new towels in a contemporary, linear design (reflecting the stripes) and a few other accessories that integrate the yellow color and voila! a beautiful, new bathroom on a budget.


Monday, October 26, 2009

Painting Tip: Painting Baseboards

It's a little tricky painting baseboards. Generally the baseboard is a different color from the walls, so there's all that cutting in to do. Use heavy cardboard or stiff, thick paper on the carpet or floor so you can paint a nice clean bottom edge and keep your floor clean. Be sure to leave the cardboard there until the paint is completely dry.
You can paint the top of the baseboard without taping if you want, but you have to have a really steady hand to avoid getting paint on the wall. Your best bet is to buy a high quality painters tape and make sure it's evenly applied so the edge is nice and clean. I recommend the tape, especially for DIY'ers - much less aggravation.
Of course you're painting your baseboard with a brush (as opposed to a roller) and you want to make sure you're not leaving streaks. So the brush you use is really important. Don't buy a cheap paint brush - your baseboard will look like that's what you used. Expect to spend around $15 for a 3" brush.
Once you've done the prep work you can go ahead and paint. If you follow these tips and take your time you'll have fabulous, professional-looking baseboards. Have fun! And if it doesn't sound like fun, call me. I think it's a blast! 312.420.2367.

Friday, October 16, 2009

Painting Tip: Updating Your Space

Here, an out-dated bedroom turns into a glorious, modern space. The original bedroom (far left) was sponge-painted in shades of yellows and green, a nice look about ten years ago but now a bit drab and dated. My client was ready for a more current, exciting look and picked a beautiful shade of red, a notoriously difficult color to paint. It has so much pigment that it's hard to get it evenly distributed so a crucial step is to use a tinted primer (2nd picture - it looks blue but it's actually a medium-gray). With a good base coat your chances of success improve dramatically.


When you're ready to begin the color coat don't skimp on the paint, and when cutting-in (right) try to do it in one stroke. Don't brush back and forth, keep it smooth and even.

Use plenty of paint when you roll the rest of the wall; roll from floor to ceiling, then go on to the next strip and finally, go over it once lightly to blend the edges. Move on to the next strip and repeat until you've completed the wall. You'll need a second coat so just do it once again and, voila! You have a beautiful, professional job.
Easy, right?
If you don't think so call us! 312.420.2367.

Wednesday, October 14, 2009

Painting Tips: Five Prep Steps

The more attention you pay to the prep work the easier and more professional your paint job will be. Don't hurry. Take your time and do it right.
Before you begin painting follow these five steps:
1. Remove all hardware, switch plates, outlet covers. Put the screws and hardware in plastic bags so you don't lose anything.
2. Move the furniture into the middle of the room so you have space to move.
3. Patch holes or small cracks with spackling compound and sand smooth.
4. Use blue painter's tape around windows, doors, ceiling.
5. Gather your materials; paint, brushes, rollers, drop cloths, etc.
Now that you've done the pain-in-the-neck stuff it's time for the fun part, making your room beautiful.
Enjoy! And if you don't think that's the fun part call us. We do! 312.420.2367.

Friday, October 2, 2009

What's Your Color Personality?

Take this quiz and find out: Color Personality Quiz.

A quiz isn't really going to pinpoint the best color for your walls but it's a fun way to begin, and interesting to think about how your personality influences your environment.
We can help you discover your color personality with a color consultation. We'll help you pick the perfect color(s) to reflect who you are, and then we'll meticulously paint your interior. It'll be gorgeous!
Call us at 312.420.2367.

Tuesday, September 29, 2009

Painting Tips: Stripes - Before and After

Stripes are a great way to add interest to a wall. Here are the Before and After shots of the project I finished last week (see last week's video). It's hard to tell from the photos but the darker strips are semi-gloss and the lighter stripes are flat. It's a very cool effect and changes the whole look of the room.
Before

Think how creative you can be with colors and geometric shapes. How about diamonds? Or diagonal stripes? Squares? In this bedroom we went two shades lighter but if you wanted a more subtle effect you could go just one shade lighter. Use your imagination...the sky's the limit!


After

The hardest part of this project is the math! Make sure your stripes are even and straight. If you need help call me: 312.420.2367. We love transforming bland into beautiful.

Tuesday, September 22, 2009

Painting Tips: Stripes - Beginning the Project

This is a perfectly lovely bedroom but my customer wanted a little more interest. So we painted stripes in a color two shades lighter than the original. The most important part of this project is measuring your wall and being sure your measurements are precise.


Stay tuned...before and after photos next week!

Tuesday, September 15, 2009

Paint a Concrete Floor

What do you do with a concrete floor when you don't have the budget for carpet or wood? Paint, what else?! It's a great way to customize your look, it creates huuuuuuge interest, and it turns blah into fabulous.
Check it out:


Be sure to clean the floor thoroughly before you prime/paint, and I do mean thoroughly: wash, sand, vacuum, wash again.
You'll love the look and it's easy enough to do. But if you're lacking ambition call Painting Ladies: 312.420.2367. We love transforming bland to beautiful.

Tuesday, September 1, 2009

It's Never What You Do...

My friend Janice Koerber from Many Hats Homeworks says, "It's never what you do, it's what you don't do that people notice."
Isn't that so true? Here's an example: I recently painted a bathroom. It was a gorgeous, deep blue and looked fabulous when I finished (I'm manic about clean lines and straight edges, especially important with dark colors). Later, I went to an open house at the client's and when I went into the bathroom...horrors! the front part of the vanity had been removed, leaving a 2" gap between the edge of the new paint and the wall. In a situation like that your eye goes directly (do not pass Go, do not collect $200) to that unpainted area. It doesn't matter how meticulous the rest of the job is, THAT'S what you see. I wanted to put up a sign that said, "THIS IS NOT HOW I LEFT IT!" or run out and get more paint and fix it on the spot. I was mortified.
It's never what you do...!

Tuesday, August 25, 2009

Sprucing Up Your Space on a Budget

If your space is looking a bit tired but your budget is on the modest side you can still spruce it up with a little creativity. Think about painting just one wall for a splash of color and to brighten your room. Pick one of the colors that shows up in your upholstery, drapes, or rug; a color that appears often enough that an accent wall will tie everything together.

Wednesday, July 29, 2009

Tips for Flawless Painting: Wall Preparation

One of the most important aspects of painting is to prep the walls appropriately. If you are going to paint over semi-gloss or high gloss you must sand the surface first to make your new paint adhere. I recommend a medium to fine grade sanding block that costs less than $3.00. A light once-over is all that's needed.

Saturday, July 11, 2009

Painting Project Completed in South Loop Chicago

Our most recently completed project is a new construction in the South Loop. Using grey and heather tones we integrated the master bedroom and bath, hallway, entry and livingroom. The feel is very modern yet inviting. Pictures to come!